

Exploring the Improved Version of the Static Rod Fishing Method
Let’s be real—if you’ve ever tried static rod fishing (you know, the one where you just set your rod down and wait for a bite), you’ve probably dealt with the same frustrations I have. That tiny rod tip? It’s impossible to tell a real fish bite from a breeze, a floating leaf, or even a random underwater current. I’ve spent hours staring at my rod, squinting like a confused owl, only to realize I missed a bite because I thought the twitch was just a gust of wind. Ugh. So when I stumbled on a way to tweak this old method? I had to test it out. Spoiler: It’s a game-changer for anyone who hates missing bites or squinting at long rods.
Why the Original Static Rod Method Sucks (Let’s Be Honest)
First, let’s rant a little (because who doesn’t love a good fishing rant?). The classic static rod setup relies on you watching the rod tip like a hawk. But here’s the problem: Most of the time, that “twitch” you see? It’s not a fish. It’s:
- A breeze strong enough to move the rod (thanks, Mother Nature)
- A tiny minnow bumping the bait (annoying, right?)
- Underwater debris floating by (why does that always happen?)
And if your rod is long? Forget it. I once used a 12-foot rod for bank fishing and could barely make out the tip—let alone tell if a fish was on. I ended up missing three bites in one hour because I thought the rod was just swaying in the wind. Total buzzkill. That’s when I decided to stop being a passive “wait and hope” angler and start experimenting.
My DIY Upgrade: Turning a Static Rod into a Signal-Sending Machine
Okay, let’s get to the good stuff. This upgrade is so simple, you don’t need fancy tools or a fishing degree. All you need is:
- Your regular static rod (I used a medium-heavy spinning rod, but any works)
- A single fishing bell (steal one from an old sea rod—we’ve all got those lying around)
- A small spring (I grabbed one from a broken pen—resourceful, right?)
- Fishing line (to tie everything together)
Step 1: Grab That Bell (No, Not the Dinner Bell)
First, I raided my old sea rod collection (because let’s be real, I have more rods than sense) and pulled off one of those tiny metal bells. You know the ones—they jingle when a fish tugs. I used to think they were only for sea rods, but nope—they’re the secret weapon here. Pro tip: Don’t use both bells. One is enough to get your attention without scaring every fish in the lake.
Step 2: Add the Spring (Yes, a Pen Spring Works)
Next, I took that tiny pen spring (shoutout to my broken ballpoint) and slid it onto the rod tip. Why a spring? Because it acts like a shock absorber for fake signals. The breeze or a minnow bump? The spring absorbs that tiny movement, so the bell doesn’t jingle. But a real fish? That tug is strong enough to compress the spring and make the bell ring. Genius, right? I tested this with a light breeze first—no jingle. Then I tugged the line with my hand (mimicking a fish)—ding ding ding! Perfect.
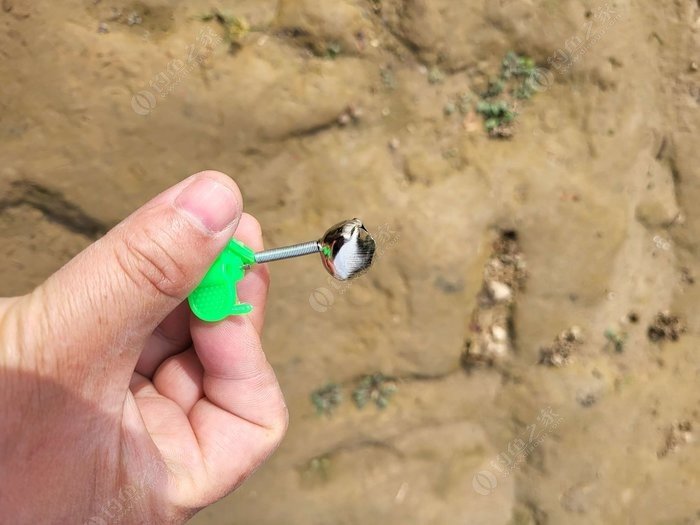
Step 3: Tie It All Together (Don’t Drop the Bell!)
Finally, I tied the bell to the rod tip with a small piece of fishing line, making sure it was tight enough that it wouldn’t fall off but loose enough to jingle. I also added a little knot at the end of the rod tip to keep the spring from sliding off. Total time? Like 5 minutes. No fancy knots—just a simple square knot works. Here’s a pic of my setup mid-build:
Field Test: Did This Actually Work? (Spoiler: Yes, and It Was Awesome)
I took this upgraded rod to my local pond—you know, the one with the big bass that always steals my bait. I set up three rods: my old static rod, the upgraded one, and a regular float rod. Here’s what happened:
First Hour: The Old Rod vs. the New Rod
The old static rod? I stared at it for 20 minutes, squinting so hard my eyes hurt. I thought I saw a twitch twice—nope, just wind. The upgraded rod? Nada… until 30 minutes in. Ding ding ding! I grabbed the rod, set the hook, and reeled in a 12-inch bass. Yes! Meanwhile, the float rod? I missed a bite because I was focused on the upgraded rod. Oops.
Second Hour: More Bites, Less Squinting
Another 15 minutes later? Ding ding ding again! This time, a 10-inch bluegill. The old static rod? Still just swaying in the wind. I even checked the bait on the old rod—still there, no bite. The upgraded rod? It only jingled when there was a real fish. No fake signals, no squinting. I could actually relax a little (gasp!) instead of staring at a rod tip like a zombie.
Here’s a pic of my first catch with the upgraded rod:

Why This Upgrade Beats the Original (And Even Sea Rods)
Let’s break down the perks—because this isn’t just a random DIY hack. It’s actually better than the original static rod and even some sea rod setups:
1. No More Squinting at Long Rods
If you use a long rod (10+ feet) for bank fishing, you know the struggle. You can barely see the tip, let alone tell if it’s moving. With the bell? You don’t have to look—you just listen. I used a 12-foot rod with this upgrade, and I could hear the bell from 20 feet away. Game. Changer.
2. Filters Out Fake Signals (Thank Goodness)
The spring is the MVP here. It absorbs tiny movements (wind, minnows, debris) so the bell only rings for real bites. I tested this by blowing hard on the rod tip—no jingle. Tugging the line with my finger (light, like a minnow)—no jingle. Tugging with my whole hand (like a fish)—ding ding ding! Perfect.
3. More Active Fishing (No More Passive Waiting)
With the original static rod, you’re just waiting for a bite. With this upgrade? When the bell rings, you know it’s a real fish—so you can set the hook immediately. No more waiting to “make sure” it’s a bite. I caught more fish in two hours with this upgrade than I did in four hours with the original method. That’s a win.
4. Super Cheap (No Fancy Gear Needed)
Let’s be real—fishing gear can get expensive. But this upgrade? I used a bell from an old sea rod, a spring from a broken pen, and fishing line I already had. Total cost? $0. Zero. Nada. You can’t beat that.
Here’s a pic of my setup in action at the pond:

What Other Anglers Are Saying (And My Hot Take)
I posted about this upgrade in a fishing forum, and the responses were mixed (as always). Some guys said, “Why not just use a sea rod?” Others said, “This is genius—why didn’t I think of this?” Let’s address the sea rod question: Sea rods are great, but they’re usually heavier and more expensive. This upgrade is lightweight, cheap, and works for both freshwater and saltwater. Plus, it’s more customizable—you can adjust the spring tightness to filter out more or less fake signals.
My hot take? If you hate missing bites or squinting at rod tips, this upgrade is a must-try. It’s simple, cheap, and actually works. I’ve used it three times now, and I’ve caught more fish than ever. No more staring at a rod tip like a fool—just relax, listen for the bell, and reel in the fish.
Final Thoughts: Give It a Shot (You Won’t Regret It)
Look, I’m not saying this upgrade will turn you into a pro angler overnight. But it will make your fishing trips more fun and less frustrating. I used to leave the pond mad because I missed bites—now I leave happy with a cooler full of fish. And the best part? It’s so easy to make. Grab a bell, a spring, and some line—you’re done in 5 minutes.
Next time you’re heading out to fish, skip the passive waiting. Try this upgrade, and let me know how it goes. Did you catch more fish? Did you stop squinting? I’d love to hear your stories. And hey—if you don’t try it, you’ll just keep missing bites. Your call.
Oh, and one last thing: Don’t forget to clean your gear when you’re done. I once left my upgraded rod in the sun, and the spring rusted. Oops. Happy fishing!


