

How to DIY a Surf Fishing Rod: A Step-by-Step Guide from a Fellow Angler
Let’s be real—surf fishing rods can be pricy. I’ve been eyeing one for months, but between my fully stocked freshwater setup and the sticker shock of store-bought surf rods, I just couldn’t pull the trigger. Then I stumbled on a random forum post: someone turning an old freshwater rod into a surf rod? Game. Changer. I thought, “I’ve got old rods gathering dust—why not give this a shot?” Spoiler: It wasn’t perfect, but it was way more fun than buying one. Let’s walk through how I did it (and the chaos that came with it).
Step 1: Pick the Right Rod to Upcycle
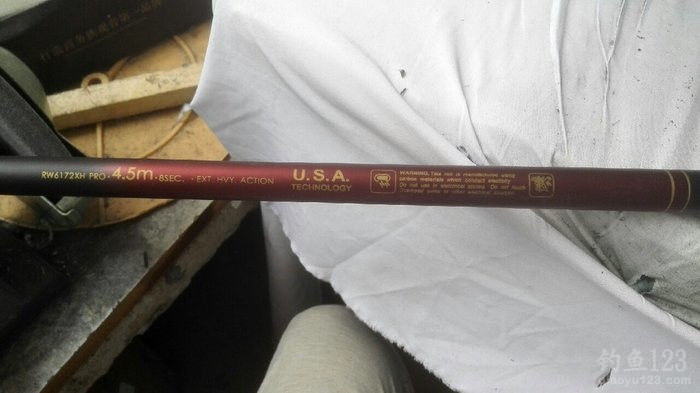
First, I had to choose my “donor” rod. I had two candidates: a beat-up 4.5m stream rod and a trusty old spinning rod. Here’s why I went with the stream rod:
- It has tons of sections (perfect for stashing in my car without taking up half the trunk).
- Stream rods are usually lighter, which is great for surf fishing (you don’t want to be hauling a heavy rod all day).
- It was just sitting there—unused, unloved, and begging for a second life.
Pro tip: If you’re using a stream rod, make sure it’s at least 4m long. Shorter rods won’t cast far enough for surf fishing. My 4.5m was just right.
Step 2: Gather Your Supplies (No, You Don’t Need a Workshop)
Here’s what I grabbed before diving in:
- Your donor rod (obviously).
- Fishing rod guides (aka “rings”—these are the little loops the line goes through).
- Rod building glue (don’t use regular glue—it’ll melt in saltwater).
- A utility knife (for trimming plastic and adjusting guides).
- Thread (optional, but helpful for securing guides if they’re a little loose).
- A reel (I ordered mine online—more on that later).
Now, here’s where I messed up: I thought I could just “wing it” with guides. Nope. You need to match the guide size to each rod section. The tip section (the smallest part) needs tiny guides, while the butt section (the thickest) needs bigger ones. Learn from my mistake—measure each section first!
Step 3: The Great Guide Hunt (Spoiler: It Was a Fight)
I headed to my local fishing shop, excited to pick up guides. The owner took one look at my stream rod and laughed. “Why bother? A new surf rod costs less than the guides you’ll need,” he said. I ignored him (sorry, buddy) and asked to see all his guides. He dumped a pile on the counter, and I spent 30 minutes sorting through them—holding each up to a rod section, squinting, and muttering to myself. Finally, I found a set that almost fit. Victory? Sort of.
Step 4: The Most Frustrating Part—Fitting the Guides
Let’s break this down by section, because each one was a different headache:
The Tip Section (aka The One That Broke My Spirit)
The tip section (the first, smallest part) was impossible. The largest guide I had was still too small. I tried peeling off the plastic coating—no luck. I even tried heating the guide (bad idea—don’t do that). Finally, I thought, “Screw it—this section doesn’t take much pressure anyway.” So I cut the tip off. Yep, you read that right. I lopped off the end of the rod so the guide would fit. It wasn’t ideal, but it worked. (Pro tip: If you do this, sand the cut end smooth so it doesn’t fray the line.)
Sections 2 & 3 (The “Almost Perfect” Ones)
These were a little better, but the guides were still too small. I grabbed my utility knife and shaved down the plastic spacers inside the guides. A little trim here, a little sand there, and boom—they fit like a glove. Moral of the story: Don’t be afraid to modify the guides a little. Just be careful not to cut the actual guide part (the metal loop).
Sections 4 & 5 (The “Too Big” Problem)
Now these guides were too big. Oops. How did I fix it? I wrapped a little fishing line around the rod section where the guide would go, then slid the guide over it. The line acted as a “shim” to fill the gap. Then I dabbed on some rod glue to keep it all in place. It looked a little janky, but it held. (Pro tip: Use a small amount of glue—too much will drip and make a mess.)
The Last Three Sections (Finally, Easy Street)
Thank goodness. These sections were the perfect size for the guides I had. No trimming, no wrapping, no swearing. I just slid them on, glued them down, and moved on. It was a miracle.

Step 5: Wait for the Reel (The Hardest Part)
My reel was on backorder. Ugh. So my DIY surf rod was a semi-finished project. I stared at it for a week, willing the reel to arrive. When it finally did? I attached it in 5 minutes (thank goodness for pre-drilled reel seats—don’t skip that if you’re buying a reel). Now it’s ready to go!
Is DIY a Surf Rod Worth It?
Let’s be honest: It’s not cheaper than buying a budget surf rod. But it’s way more fun. I learned a ton, I got to use an old rod that was just gathering dust, and I have a custom rod that’s mine—flaws and all. Would I do it again? Absolutely. But next time, I’ll measure the guides first. (Lesson learned.)
If you’re thinking about trying this, here’s my advice:
- Start with a rod you don’t mind ruining (just in case).
- Measure every section before buying guides.
- Don’t listen to the guy at the fishing shop (okay, maybe listen a little—but don’t let him discourage you).
- Have fun! It’s not about making a perfect rod—it’s about the process.
Oh, and if you want more DIY fishing projects, check out my other posts: How to Build a DIY Fishing Platform and How to Make a DIY Jig Hook. They’re just as chaotic (and just as fun).
")

")