
 for Fishing")
How to Make a Sturdy & Practical DIY Carp & Silver Carp Rig (Water Monster) for Fishing
Hey fellow anglers! I’m your go-to fishing buddy who’s always tinkering with gear instead of just buying it—because let’s be real, store-bought stuff never feels as satisfying as something you made with your own two hands. Today, we’re diving into how I turned a random pharmacy bottle into a DIY carp and silver carp rig (affectionately called a “water monster” by us old-timers) that’s actually tough enough to handle those hard-fighting silver carp. Spoiler: It’s way more practical than those flimsy store-bought spring rigs I’ve tried before, and it works like a charm for us casual fishermen who don’t have time to camp out for giant fish 24/7.
Why I Ditched Spring Rigs & Decided to DIY a Water Monster
Let’s set the scene: It’s golden autumn, the best time for fishing before winter hits hard. Last year, I obsessed over big fish slip sinker rigs all winter—only to have them worn out in months because the local big fish are basically extinct (thanks, overfishing). So I switched to silver carp. Why? Because they fight like crazy—those runs? *Chef’s kiss*—and they’re way more common around here.
But here’s the problem: My first few trips with store-bought spring rigs were total flops. The bait fell off too fast, the rigs bent if a silver carp even glanced at them, and I went home empty-handed every time. That’s when I thought: “Why not make my own? I make almost everything else—why not a water monster?”
Store-bought rigs are fine, but DIY ones let you tweak every little thing (like how much bait it holds) and give you that “I made this” high when you catch a fish. Plus, silver carp love bait that stays in the water long enough to create a big cloud—so a bigger, sturdier cage is key. So off I went to hunt for materials.
Step 1: Hunting for the Perfect Material (AKA Begging the Pharmacy Lady)
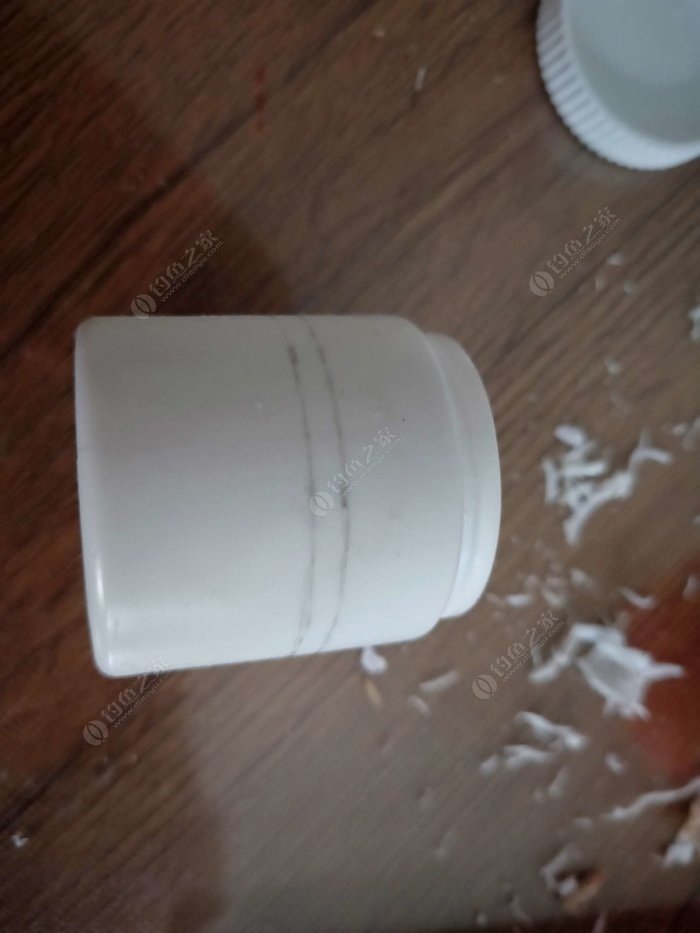
My first attempt at a small water monster was garbage—too flimsy, the lid wouldn’t stay on. So I hit up the local pharmacy. Here’s a pro tip: If you want a free bottle, compliment the owner’s wife. Works every time. I walked in, laid on the charm (“Wow, Mrs. Li, your new haircut makes you look 10 years younger!”), and walked out with a medium-sized plastic bottle that was perfect—sturdy, the right size for hand fishing, and not too big to cast.
Before I started cutting, I knew I had to fix the screw top. Screw tops are a pain for bait—they’re hard to open and close, and the threads break easily. So I planned to turn it into a snap-on lid. Game changer.
Step 2: The Tools You’ll Need (No Fancy Gear Required)
You don’t need a workshop for this. Just grab these basics from your junk drawer:
- Utility knife or box cutter (be careful—these are sharp!)
- Measuring tape (to make sure your cuts are even)
- Pencil (for marking your design)
- Rubbing alcohol or a hair dryer (to peel off the bottle label without leaving sticky residue)
- Band-aid (trust me—you’ll need this if you’re as clumsy as me)
Step 3: Prepping the Bottle (Label Removal & Lid Hack)
First, get rid of that annoying label. Spray some rubbing alcohol on it, let it sit for 30 seconds, and peel it off. If it’s stubborn, use a hair dryer on low heat to loosen the glue. No sticky mess = no bait sticking to the bottle later.
Turning the Screw Lid into a Snap-On Lid
This is the most important part for practicality. Here’s how I did it:
- Take the bottle and cut the neck just below the last screw thread. Use the utility knife—go slow, don’t rush. I almost cut my finger here (hence the band-aid).
- Now cut the lid to the same height as the bottle neck. The lid is harder plastic, so be extra careful. If you mess this up, you’ll have to go back to the pharmacy and compliment the lady again (which I did once—oops).
- Now the lid should snap right onto the neck. Test it a few times—if it’s too tight, sand the edges a little. If it’s too loose, wrap a tiny bit of tape around the neck. Perfect snap-on lid = easy bait loading and no spills.
Step 4: Cutting the Bait Holes (Design Your Dream Rig)
Now the fun part—designing the holes. Silver carp feed by filtering water, so you need enough holes for bait to escape but not so many that the bait falls out too fast. I measured 1-inch gaps between holes and drew a cool pattern (I’m not an artist, but it looks okay).
Pro tip for cutting: Hold the bottle steady on a flat surface. Put a band-aid on your index finger, then press the finger against the back of the knife blade to guide it. Go slow—one wrong move and you’ll have a lopsided hole (which I did once, and had to start over). For the lid, cut smaller holes—those are for extra bait to escape and attract silver carp from above.
Step 5: Rigging the Hooks (The Secret to Catching Silver Carp)
Okay, let’s talk hooks. I used New Shandong No. 5 hooks—they’re sharp, strong, and perfect for silver carp (not too big, not too small). But here’s my secret hack to make the rig way better:
I took a old float seat (the plastic part that holds the float on the line) and cut off the bottom to expose a tiny hole. Then I threaded the hook through the hole and pushed it up to the hook shank. Why? This does two things:
- It strengthens the hook—so a big silver carp can’t bend it.
- It makes the hook move more naturally when the silver carp sucks in bait. Silver carp are skittish, so natural movement = more bites.


Step 6: Adding the Finishing Touches (Lead Sinker & Space Beads)
You’re almost done! Two more things:
- Lead sinker: I added a small lead sinker to the bottom of the rig. Why? Silver carp bait is light (you want it to dissolve slowly), so the sinker helps the rig sink fast to the right depth. No more waiting 5 minutes for the bait to hit the water!
- Space beads: Don’t forget these! They stop the line from rubbing against the rig and wearing out. I almost skipped this—good thing I remembered. High-frequency casting (like when you’re chasing silver carp) will destroy your line without them.
Testing the Rig: Did It Work?
I took this bad boy out last weekend. Bait: dry, crumbly silver carp mix (you want it to dissolve in 5-10 minutes). Cast it out, and within 2 minutes, I felt a tug. *BOOM*—a 5-pound silver carp! It fought like crazy, but the rig held up. No bent hooks, no broken bottle, no bait falling off. I was so proud I did a little dance on the shore (don’t judge).
Since then, I’ve used it 3 more times. Every time, it’s held up. The snap-on lid makes loading bait a breeze (even with wet hands), the holes are perfect for bait release, and the reinforced hooks haven’t bent once. It’s way sturdier than any store-bought rig I’ve tried, and it’s way more fun to use because I made it.
Why This DIY Rig Beats Store-Bought Ones
Let’s be real—store-bought rigs are convenient, but they’re not tailored to your needs. This DIY rig:
- Is cheaper (free bottle, old float seat, hooks you already have)
- Is sturdier (thick plastic bottle vs. thin store-bought wire)
- Is more practical (snap-on lid, perfect hole size for your bait)
- Gives you that “I made this” high when you catch a fish
Plus, if you mess up a part, you can fix it easily. Store-bought? You have to buy a whole new one. No thanks.
Final Thoughts: DIY Fishing Gear = More Fun
I’ve always been the guy who makes his own gear—line, hooks, rigs, you name it. It’s not just about saving money (though that’s a bonus). It’s about the process. Tinkering, failing, fixing, and finally making something that works. When you catch a fish with a rig you made from a pharmacy bottle and a old float seat? That’s better than any trophy. Way better.
So if you’re tired of flimsy store-bought rigs, give this a try. Grab a bottle, some tools, and get to work. And if you mess up the lid? Just go compliment the pharmacy lady again—she’ll love it. Trust me.
Next time, I’m gonna try making a bigger rig for those monster silver carp. Stay tuned— I’ll share how it goes. Until then, tight lines!


