
")
Homemade Fishing Bait Feeders: 2 Easy DIY Projects for Better Fishing Results (No Fancy Gear Needed!)
“To catch more fish, you gotta set a good spot first” – that’s the classic fishing saying, right? I swear, it’s like gospel for us traditional anglers. But let me tell you, ever since I started using homemade bait feeders, my catch rate has skyrocketed! And don’t even get me started on store-bought ones – they’re either overpriced or just plain useless. Today, I’m gonna spill the tea on how I make my own feeders, and you won’t believe how simple it is!
First off, let’s get real: scaring fish with clumsy gear? Not cool. But homemade feeders? You can tweak every part to your exact needs. Let’s dive in!
Why Homemade Fishing Feeders Are My #1 Pick (Over Store-Bought)
Okay, let’s be honest: buying a “premium” bait feeder from the tackle shop? $30-$50? That’s like buying a $50 coffee when you can make a $2 one at home. Ugh, no thanks! Plus, store-bought feeders are often made with cheap plastic that breaks after a few uses, or they’re designed for specific rods (way too rigid). But my DIY ones? I’ve used the same plastic bottle feeder for three seasons now, and it’s still going strong. Here’s why homemade wins:
- Budget-Friendly: Use trash (bottles, old containers) to make ‘em. No need to shell out cash for overpriced gear!
- Customizable: Want a feeder that fits your hand rod perfectly? Adjust the size, holes, and weight to your heart’s content.
- No Scaring Fish: Homemade feeders are quiet, smooth, and designed to drop bait gently – fish barely notice!
- Lightweight & Easy: Handy for quick trips, no heavy equipment to carry around. Perfect for hiking to remote spots!
Honestly, the only downside? You might get judged by other anglers for using “junk.” But when you pull in a monster bass with your homemade feeder, they’ll be eating their words. 😉
Seasonal Bait Feeding: When & Where to Cast Your Net
Wait, not all bait feeders are created equal! You gotta pick the right type based on the season and water depth. Let me break down my go-to spots for different seasons – this is how I’ve caught so many fish in the wild:
Spring: Shallow, Sun-Kissed Waters
Spring is when fish are super active! They’re hungry after winter and looking for warmth. So I hit shallow waters – 1-3 feet deep – near grass beds, under overhanging trees, or shoreline edges. These spots are like fish restaurants! My surface feeder is perfect here because it drops bait gently on the surface without spooking them. Pro tip: Avoid windy areas, fish get skittish when water’s choppy.
Summer & Autumn: Deep, Cool Shade
Summer heat? Fish hate it! They’re hiding in deep, shaded spots – 5-10 feet deep, maybe more in big lakes. These areas stay cool, so fish chill there. My homemade bottom feeder is a lifesaver here because it drops straight to the bottom where they’re hiding. Avoid direct sunlight; fish prefer dappled shade under trees or rock formations.
Winter: Backward Sunny Slopes
Winter’s tough – fish are sluggish! I target north-facing slopes (Northern Hemisphere) because they catch morning sun and warm up. Shallow but with a bit of depth (2-4 feet) – the fish will sunbathe here. My bottom feeder works best here, dropping bait right where they’re resting. Just don’t forget to test the depth first! I once fished a super deep lake and realized too late my surface feeder was useless… oops.
Pro tip: Always check water depth before choosing a feeder. A surface feeder in deep water? Bait spreads out everywhere, fish ignore it. Lesson learned the hard way! Let’s get into DIY feeders now – two types, two projects.
DIY Fishing Feeders: Surface vs. Bottom Types – Which One’s For You?
There are two main types: surface feeders (float on top) and bottom feeders (sink to the bottom). Each has pros/cons, so let’s see which fits your style!
Surface Bait Feeders: For Shallow, Open Waters
These float on the surface, perfect for shallow water (2 meters max!). The key is to drop bait gently without scaring fish. Here’s how I make mine:
Materials You’ll Need (All Reusable!)
- Clean plastic bottle (mineral water, soda, juice – whatever you have lying around!)
- Scissors (to cut the bottle)
- Drill + small drill bits (or hammer + nail for old-schoolers)
- 8-10 small drill holes (1/4 inch, max!)
- Strong rope (nylon/clothesline works)
- Small hook (to hang on your rod)
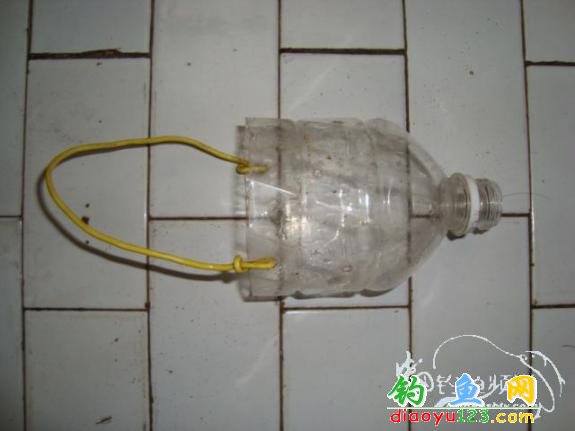
Step 1: Prep the Bottle
Cut the bottle about 2 inches from the bottom (so you have a “cup” shape). Save the cap – you’ll need it to close the feeder. Drill 8-10 holes around the bottle’s side, 1-2 inches below the top edge. Why? To prevent the vacuum effect! I learned this the hard way – first try, the feeder sank because no air could escape. Oops! Now with holes, it floats perfectly.
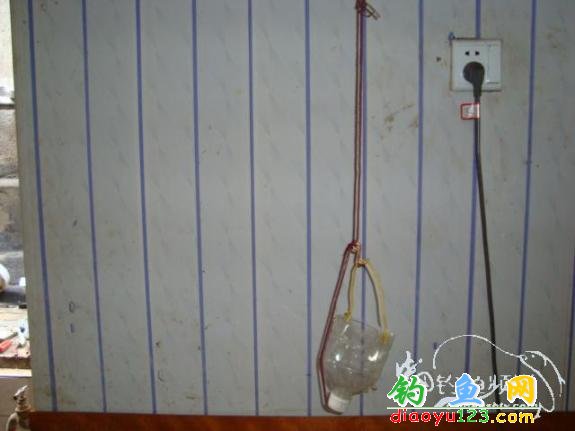
Step 2: Add the Rope & Hook
Cut a rope 2-3 feet long. Tie a loop at one end, attach a small hook (I use old fishing hooks, thrift store finds!). Tie the other end to the bottle’s top hole (make a small hole near the top for the rope). The hook hangs on your rod, so when you cast, the feeder floats, and pulling the rope opens the cap to release bait.
Pro Tip: Test it in your bathtub first! Fill with bait (corn, bread, pellets), close the cap, and see if it drops smoothly. If the holes are too big, bait spills fast; too small, it clogs. 8-10 holes = sweet spot, trust me! I’ve caught tons of panfish with this setup – bluegill love it.
Bottom Bait Feeders: For Deep Water & Steady Casts
Bottom feeders sink to the bottom, perfect for deep water or when fish are lying on the lakebed. They’re stealthy and drop bait exactly where you want it. Here’s how I make mine:
Materials for the Bottom Feeder
- Air freshener bottle (or small spray bottle with a narrow neck)
- Small metal piece (tin can cut into strips, nails, or old clips)
- Button + 502 glue (for the latch)
- Strong fishing line (10lb+ test)
- Small weight (optional, helps sink faster)
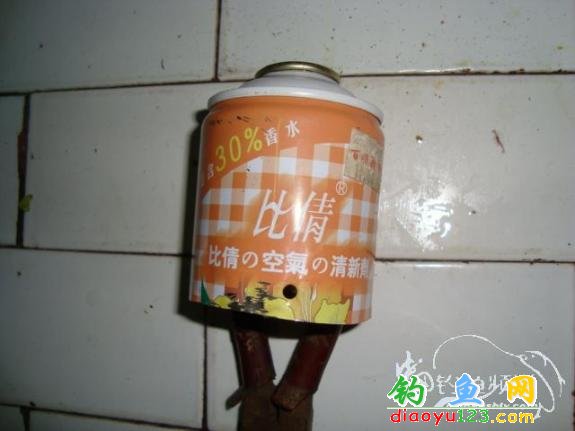
Step 1: Cut & Prepare the Bottle
Cut the air freshener bottle in half, keeping the top half (spray head area) as the lid. Drill a small hole in the lid for the fishing line. For the bottom part, make another hole near the bottom edge. This is where the line goes through to attach to the weight.
Step 2: Add the Latch
Use a button and metal piece (I cut a tin can into a small strip). Glue the button to the inside of the lid and the metal strip to the outside of the bottom container. When you release the line, the button unlatches, dropping bait. Test this latch – if it’s too loose, bait spills early; too tight, it won’t open. Balance is key!
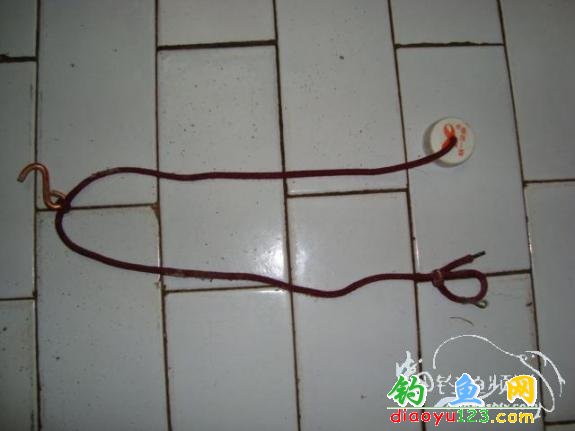
Step 3: Attach Line & Weight
Tie the fishing line to the weight, then thread it through the bottom hole, up through the lid hole, and tie off. The weight pulls the feeder down; when you release the line, the latch opens, and bait spills. Pull the line back, and the feeder pops out clean for reuse!
Success Story! Last winter, I used this bottom feeder in 12 feet of water and caught a 4-pound trout! The metal latch held tight, and the bait dropped right where it should. Fish didn’t even notice until it was too late – classic win.
Final Thoughts: Why DIY is the Way to Go
So there you have it – two easy DIY bait feeders that’ll save you cash and catch more fish! No more overpriced, flimsy store-bought gear. Just grab old containers, a few tools, and you’re set. I love that these feeders are lightweight, customizable, and quiet enough to not scare fish. Plus, they’re eco-friendly – repurposing trash is the ultimate flex!
Last weekend, I took my surface feeder to a local lake and caught three bass in an hour! Felt like a pro, even though I was using trash from my garage. If you’re tired of overpriced gear, give these projects a shot. And if you do, drop me a comment – I’d love to hear about your catches! Tight lines, and happy fishing – see you on the water!
Quick Recap:
– Surface feeders = shallow water, float gently, test holes to avoid vacuum.
– Bottom feeders = deep water, steady casts, metal latch = magic.
– Reuse old bottles/containers to save cash and the planet! 🎣


