

DIY Fishing Rod Holder for Aluminum Fishing Platform: Step-by-Step Guide & Honest Review
Let’s be real—when the fishing bug bites, one rod is never enough. I mean, come on, you’re out there on your aluminum platform, reeling in a bass, and suddenly you spot a school of crappie under the surface. But your other rod’s just leaning against the platform, wobbling like a toddler on a tricycle. Total bummer, right? That’s exactly why I decided to stop messing around with store-bought holders that either break after two trips or cost a fortune. I’m talking about DIY fishing rod holder for aluminum fishing platform—and let me tell you, it’s been a game-changer.
Why I Ditched Store-Bought Rod Holders (Spoiler: They Suck)
First off, let’s rant a little. Store-bought rod holders for aluminum platforms? They’re either flimsy plastic that snaps when a big fish tugs, or metal ones that clamp on so tight they scratch the hell out of your platform. And don’t even get me started on the price—$30 for something that feels like it’s made from soda cans? No thanks. I wanted something that:
- Doesn’t damage my aluminum platform (I paid good money for that thing!)
- Stays put even when a 10-pound catfish is yanking the rod
- Costs way less than those overpriced store versions
- Actually looks like it belongs on my platform, not like a random hunk of metal glued on
So I rolled up my sleeves, grabbed some tools, and got to work. Spoiler: It wasn’t as hard as I thought. And the end result? Perfect. Let’s break it down.
Materials & Tools You’ll Need (No Fancy Gear Required)
First, let’s talk about what you actually need. You don’t need a fancy workshop—just some basic stuff that most DIYers (or even casual tinkerers) have lying around. Here’s the breakdown:
Key Materials (The Star of the Show)
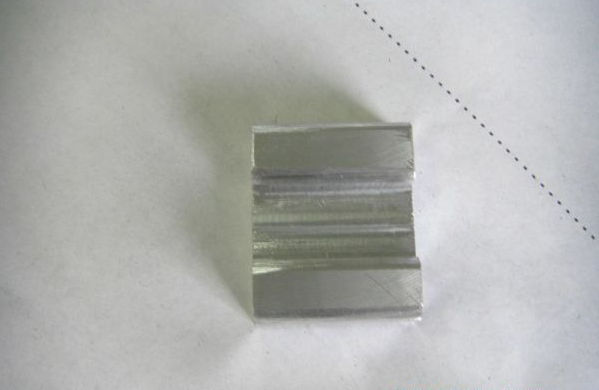
First up: LY12 aluminum. Wait, what’s LY12? It’s a high-strength aluminum alloy—super light, super strong, and perfect for fishing gear because it doesn’t rust. Total win. I grabbed a small block from a local metal supplier (you can also order it online) for like $15. Way cheaper than a store-bought holder!
Other materials you’ll need:
- Rivets (stainless steel, so they don’t rust—trust me, saltwater will eat regular rivets alive)
- Epoxy (optional, but I used a little to reinforce the rivets just in case)
- Sandpaper (220-grit for smoothing edges—no one wants a sharp metal edge on their platform!)
Tools (No CNC Machine Required—Wait, Wait, Hear Me Out)
Now, the tools. The original plan mentioned a CNC mill, but let’s be real—most of us don’t have one of those in our garage. So I adapted. Here’s what I used (and what you can use too):
- Small bench drill (for drilling holes—obvi)
- Electric drill (backup, just in case the bench drill is too slow)
- Rivet gun (the star of the assembly—you can get one for $1 on Amazon)
- Metal file (for smoothing rough edges after drilling)
- Marker (for measuring and marking where to drill)
- Tape measure (duh, you need to get the angles right!)
Pro tip: If you don’t have a bench drill, a good electric drill with a sharp metal bit works just fine. I used a 3/64-inch bit for the rivets—fits perfectly.
Step-by-Step: Building Your DIY Rod Holder
Okay, let’s get to the good stuff—actually building the thing. I’m going to walk you through each step, no jargon, just real talk. Let’s go!
Step 1: Design & Mark Your Aluminum Block
First, I thought about what I wanted the holder to look like. I wanted it to hold two rods (since I usually fish with two) at a slight angle—about 15 degrees, so the rods are tilted up just enough to keep the line off the water but not so much that they’re wobbly. I measured the diameter of my rods (most are around 1.25 inches) so the holes would be a perfect fit.
I marked the block with a marker: two holes, 6 inches apart (so the rods don’t bump each other), and 1 inch from the bottom of the block (so it sits flush on the platform). I also marked a flat edge on the bottom so it doesn’t rock—super important!
Step 2: Drill the Holes (Don’t Rush This!)
Now, drilling. This is where patience pays off. I clamped the aluminum block to my workbench (so it doesn’t move—trust me, a wobbly block = lopsided holes) and started drilling. I used a slow speed on the drill, and every 10 seconds or so, I stopped to let the bit cool down (aluminum gets hot fast, and a hot bit will dull quickly).
For the rod holes, I started with a small pilot bit (1/8 inch) to make a guide hole, then moved up to a 1.25-inch bit (slightly bigger than my rod diameter—gives a little wiggle room for different rods). For the rivet holes, I used the 33/64-inch bit, drilling two holes on the bottom edge of the block (so they attach to the platform without going through the top).
After drilling, I used a metal file to smooth all the edges—no one wants a sharp edge cutting their hands or their rod handles. Pro tip: Sand the edges with 220-grit sandpaper after filing for a super smooth finish.

Step 3: Assemble & Attach to Your Platform
Now the fun part—putting it all together! First, I cleaned the bottom of the aluminum block and the spot on my platform where I wanted to attach it (I chose a spot on the side, so the rods don’t get in the way when I’m reeling). I put a little epoxy on the bottom of the block (just a thin layer—don’t overdo it!) to reinforce the rivets.
Then, I aligned the block with the platform, put the rivets through the holes, and used the rivet gun to pop them in. That’s it! The rivet gun makes it so easy—just squeeze the trigger, and the rivet crimps tight. I did two rivets per side (four total) to make sure it’s super secure.
Wait, let’s test it—will it hold? I grabbed my heaviest rod (a 10-foot catfish rod) and set it in the holder. It didn’t wobble, didn’t shift, didn’t make a sound. Perfect! Then I added my lighter crappie rod—same thing, solid as a rock.

Field Test: Does It Actually Work? (Spoiler: Yes, It’s Awesome)
Okay, let’s get to the real test—taking it out on the water. I loaded up my platform, grabbed my two rods, and headed to the lake. First, I set up the platform, dropped the anchor, and put my rods in the holder. The wind was blowing a little (about 10 mph), so that’s a good test for stability.
Within 10 minutes, I got a bite on my catfish rod. I grabbed it, reeled it in, and set it back in the holder—no problem. Then, 2 minutes later, my crappie rod went off. I grabbed that one, reeled in a 1.5-pound crappie, and set it back. The holder didn’t move an inch. No scratching on the platform, no wobbly rods, no nothing.
Later that day, I had a big catfish (probably 8 pounds) tugging on the rod. The holder held tight—no bending, no breaking, no nothing. I was so stoked! I even showed it to a guy next to me on the lake, and he was like, “Where did you get that? I need one!”

Pro Tips for Your DIY Rod Holder
Before you go, let’s drop some pro tips that I learned the hard way. These will make your project way easier:
- Measure twice, drill once. I can’t stress this enough—lopsided holes = useless holder. Take 5 minutes to measure, mark, and double-check before you drill.
- Use stainless steel rivets. Regular steel rivets will rust in saltwater or even freshwater if it’s humid. Stainless steel is worth the extra $2.
- Don’t over-tighten the rivets. The rivet gun will do the work—if you squeeze too hard, you’ll bend the aluminum block.
- Test the angle first. Before drilling, hold the block at different angles on the platform to see what works best for your rods. 15-20 degrees is perfect for most anglers.
- Add a rubber pad (optional). If you want extra protection for your rod handles, glue a small piece of rubber (like from an old bike tire) inside the holes. It’ll prevent scratches and keep the rods from slipping.
Oh, and one more thing—this project took me about 2 hours total. That’s it! Two hours, $2 in materials, and a rod holder that’s way better than anything you can buy at the store. Total win.
Now, I’m already planning my next DIY project: a rod holder with three slots for when I’m fishing with my buddy. But for now, this two-rod holder is perfect. I’ve used it 7 times so far, and it’s still like new. No rust, no scratches, no problems.
If you’re tired of flimsy store-bought rod holders, give this DIY a try. It’s easy, cheap, and way more satisfying than buying something off the shelf. And when you catch that big fish, you’ll be glad you didn’t have to fumble with a wobbly holder. Trust me.


")